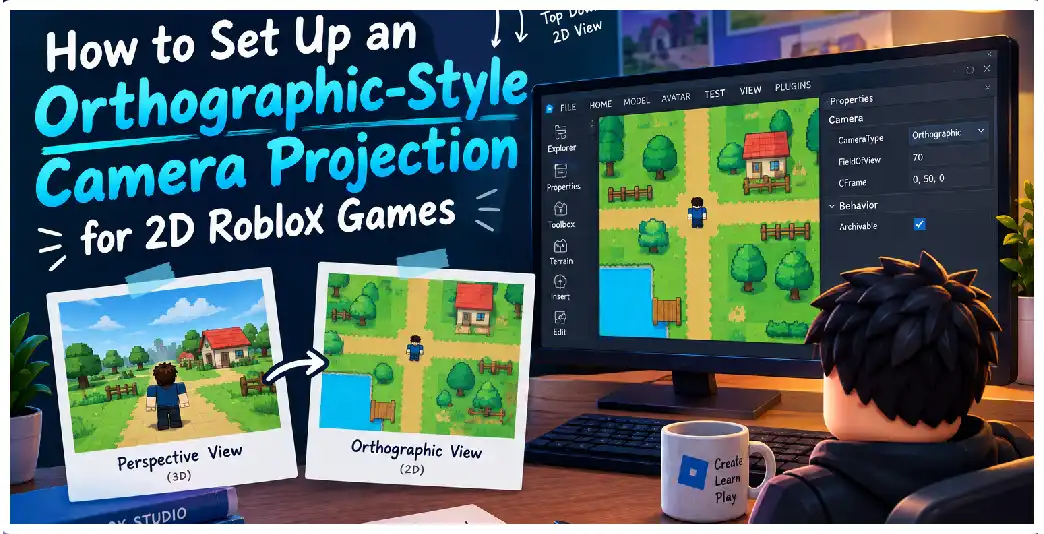
A controlled camera is one of the most important systems in a 2D Roblox game. Whether you are building a platformer, top-down adventure, tactical game, puzzle experience, arcade game, or side-scrolling RPG, the camera determines what the player sees and how the world feels.
Many developers search for a property that directly switches Roblox Studio from perspective projection to orthographic projection. However, the current Camera API does not expose a native orthographic projection mode. The documented Camera class includes CFrame, CameraType, FieldOfView, FieldOfViewMode, Focus, and viewport-related properties, but it does not include an orthographic projection setting or an OrthographicSize property.
Consequently, a robust Roblox implementation should be described as an orthographic-style camera system rather than a true orthographic renderer.
That distinction matters particularly when developing games that depend on exact object-size consistency.
Understanding the Projection Problem
A perspective camera projects 3D points onto a screen in a way that causes distant objects to appear smaller.
This is how conventional cameras work.
If two identical objects are positioned at different distances from the camera, their screen-space sizes will normally differ.
A true orthographic camera does not behave that way.
This makes orthographic projection especially attractive for games that treat the world as a flat board or plane.
Examples include:
- Tile-based strategy games
- Tactical RPGs
- 2D platformers
- Puzzle games
- Board games
- Top-down arcade games
- Isometric strategy games
Roblox, however, exposes perspective camera controls rather than a native orthographic projection switch through its standard Camera object.
The Practical Roblox Solution
The practical solution consists of several layers:
- Take control of the camera.
- Fix its orientation.
- Control its distance.
- Use a suitable FOV.
- Restrict camera movement.
- Lock player depth where necessary.
- Establish camera bounds.
- Handle different aspect ratios.
- Separate world-space rendering from UI.
- Test on multiple devices.
This produces an experience that can behave like a 2D camera from the player’s perspective.
Step 1: Create a Local Camera Controller
Camera control belongs on the client because each player has their own local Camera in Workspace. The camera documentation states that each client has its own Camera, accessible through Workspace.CurrentCamera.
A common starting point is a LocalScript in:
StarterPlayer
└── StarterPlayerScripts
    └── CameraController
Then retrieve:
local camera = workspace.CurrentCamera
Step 2: Switch to Scriptable
The next step is:
camera.CameraType = Enum.CameraType.Scriptable
Scriptable tells the standard camera behavior not to automatically update the camera. This is the documented approach for developers who need to position and orient a custom camera themselves.
This is the foundation of the entire system.
Step 3: Establish a Camera Coordinate System
Before writing movement code, decide which axis represents what.
For a side-scroller, a simple coordinate system might be:
X = horizontal gameplay
Y = vertical gameplay
Z = depth
The player can move in X and Y.
Z is restricted.
The camera remains at a fixed Z distance.
This produces a flat gameplay plane.
Step 4: Orient the Camera
Use CFrame.lookAt().
For example:
local cameraPosition = Vector3.new(0, 20, 100)
local targetPosition = Vector3.new(0, 10, 0)

camera.CFrame = CFrame.lookAt(
    cameraPosition,
    targetPosition
)
The CFrame API supports creating an orientation from a camera position and target point.
This is preferable to manually calculating Euler rotations in many situations.
Step 5: Establish Focus
For a Scriptable camera, set:
camera.Focus = CFrame.new(targetPosition)
Focus is not the same thing as where the camera is looking.
Instead, it identifies an area of the 3D world that should receive priority for certain graphical processing.
The documentation specifically notes that Scriptable cameras should update Focus because some visual systems use it to determine which region receives higher processing priority.
Step 6: Follow the Player
For a platformer, find the character’s root part.
local root = character:FindFirstChild("HumanoidRootPart")
Then use its X coordinate to position the camera.
local cameraX = root.Position.X
Keep the camera’s Z coordinate constant.
This is the basic foundation of a side-scrolling camera.
A Complete Basic Controller
A minimal system could look like:
local Players = game:GetService("Players")
local RunService = game:GetService("RunService")

local player = Players.LocalPlayer
local camera = workspace.CurrentCamera

camera.CameraType = Enum.CameraType.Scriptable

local CAMERA_Z = 100
local CAMERA_Y = 15

RunService:BindToRenderStep(
    "TwoDCamera",
    Enum.RenderPriority.Camera.Value,
    function()
        local character = player.Character

        if not character then
            return
        end

        local root = character:FindFirstChild("HumanoidRootPart")

        if not root then
            return
        end

        local x = root.Position.X

        local position = Vector3.new(
            x,
            CAMERA_Y,
            CAMERA_Z
        )

        local target = Vector3.new(
            x,
            CAMERA_Y,
            0
        )

        camera.CFrame = CFrame.lookAt(
            position,
            target
        )

        camera.Focus = CFrame.new(target)
    end
)
This should be considered a starting architecture rather than a complete production camera.
Why This Is Not Truly Orthographic
Notice that the camera is still positioned at a finite distance from the world.
The camera still has a field of view.
Therefore, perspective remains part of the projection.
Moving an object farther away along the depth axis can still change its apparent size.
That is the fundamental limitation of this approach.
Using a Narrow Field of View
A narrow field of view can reduce the visual feeling of perspective.
The FieldOfView property controls how much of the 3D world is visible vertically, while horizontal coverage is related to the viewport aspect ratio.
You could therefore use:
camera.FieldOfView = 20
or another appropriate value.
However, the exact value should be chosen based on the game.
Do not assume a particular FOV is universally correct.
FieldOfView Is Not OrthographicSize
This is an important distinction.
Some game engines expose an orthographic camera through a property such as:
OrthographicSize
Roblox’s current standard Camera class does not expose such a property.
Therefore, code such as:
camera.OrthographicSize = 20
should not be presented as a standard Roblox Camera solution.
Instead, use camera position, FOV, and custom framing logic.
Building a Fixed-Frame Camera
Some 2D games do not need the camera to follow the character continuously.
You can create a fixed camera.
For example:
camera.CFrame = CFrame.lookAt(
    Vector3.new(0, 20, 100),
    Vector3.new(0, 10, 0)
)
This is appropriate for:
- Fighting arenas
- Puzzle rooms
- Single-screen games
- Arcade challenges
- Board-style games
Creating Screen-by-Screen Scrolling
A more advanced platformer can divide the world into camera rooms.
Instead of continuously following the player, the camera changes when the player crosses a boundary.
For example:
Room 1 | Room 2 | Room 3 | Room 4
When the player crosses from Room 1 to Room 2, the camera moves to the next position.
This approach can create a classic 2D game feel.
Smooth Room Transitions
Use CFrame interpolation or TweenService.
CFrame supports Lerp(), which interpolates between CFrames.
For example:
local targetCFrame = CFrame.lookAt(
    newCameraPosition,
    newTarget
)

camera.CFrame = camera.CFrame:Lerp(
    targetCFrame,
    0.08
)
This creates a smooth transition.
Camera Dead Zones
A dead zone prevents the camera from reacting to every small player movement.
For example, define:
local LEFT_LIMIT = -8
local RIGHT_LIMIT = 8
If the player remains inside the zone, the camera remains stationary.
If the player moves outside it, the camera begins following.
This makes the game feel less mechanically attached to the player.
Vertical Camera Following
A platformer may need both horizontal and vertical tracking.
You can selectively follow Y.
For example:
local targetY = math.max(
    root.Position.Y,
    minimumCameraY
)
Then construct the camera using the desired X and Y values.
Avoid following every vertical movement if your game contains jumps because the camera may bounce excessively.
Camera Look-Ahead
Advanced platformers can move the camera slightly ahead of the player’s direction.
If the player is moving right, the camera can show slightly more of the level ahead.
Conceptually:
local lookAhead = 5
local cameraX = root.Position.X + lookAhead
This can improve awareness.
However, the offset should be subtle.
Camera Boundaries
Use math.clamp().
local cameraX = math.clamp(
    root.Position.X,
    minX,
    maxX
)
This ensures the camera stays inside the level.
For a larger world, you can calculate these values from level geometry rather than hard-coding them.
Top-Down Orthographic-Style Games
For top-down games, place the camera above the gameplay plane.
Example:
local position = Vector3.new(
    target.X,
    100,
    target.Z
)
Then look down toward the target.
A top-down game might use:
X = horizontal
Z = vertical gameplay
Y = height
This is different from a side-scroller’s coordinate arrangement.
Isometric Camera
An isometric-style camera is positioned diagonally.
For example:
local offset = Vector3.new(60, 60, 60)

local position = target + offset

camera.CFrame = CFrame.lookAt(
    position,
    target
)
This is still perspective.
It simply uses a carefully controlled diagonal viewpoint.
Why Isometric and Orthographic Are Often Confused
Isometric describes a visual arrangement and camera orientation.
Orthographic describes a projection model.
They are related in many traditional game designs, but they are not identical.
You can create an isometric-looking Roblox game with a perspective camera.
Keeping Depth Consistent
If the game is intended to behave as 2D, you should also control player movement.
For example, the player may be allowed to move along:
X
Y
but not:
Z
This prevents the player from changing depth and exposing the perspective behavior.
Depth Layers
You can still use multiple depth layers for visual effects.
For example:
Background: Z = -10
Gameplay:   Z = 0
Foreground: Z = 10
The camera can remain fixed.
However, because Roblox still uses perspective, large depth differences can produce scale changes.
Therefore, keep layer distances appropriate for the intended appearance.
Parallax Backgrounds
A 2D game can use multiple depth layers deliberately.
For example:
- Background moves slowly.
- Gameplay layer moves normally.
- Foreground moves slightly faster.
This creates parallax.
If you want a completely flat appearance, avoid large depth differences.
UI Architecture
Do not place every 2D element inside the world.
Roblox’s ScreenGui system provides on-screen UI containers for labels, frames, buttons, images, and other GUI elements.
Use world-space objects for gameplay.
Use ScreenGui for:
- Score
- Health
- Buttons
- Menus
- Inventory
- Notifications
This separation simplifies the project.
Aspect Ratio Management
A 2D game designed at one resolution can behave differently on another.
Roblox’s camera ViewportSize reports the device safe-area dimensions, while the actual fullscreen rendering area can differ on devices with notches or cutouts.
Therefore, camera framing should not assume one fixed pixel resolution.
Designing for 16:9
Many developers initially design their level for 16:9.
That’s fine as a baseline.
But players may use:
- Wide monitors
- Standard monitors
- Tablets
- Phones
- TVs
Your camera should account for these variations.
Using Camera FOV Modes
Roblox provides FieldOfViewMode options including Vertical, Diagonal, and MaxAxis.
This can affect how your camera responds when the viewport aspect ratio changes.
For a 2D-style game, choose a strategy that matches whether you want the vertical or horizontal game area to remain visually consistent.
Testing Devices
Studio provides a Device Emulator for testing different device sizes and screen configurations.
Use it before release.
Test:
- Desktop
- Laptop
- Tablet
- Phone
Check whether the gameplay area remains usable.
Handling Extra Horizontal Space
A wide display may show more of your level.
You need to decide whether that is acceptable.
One strategy is to allow extra space.
Another is to preserve a fixed gameplay frame and use letterboxing or decorative UI.
A third strategy is to dynamically adjust the camera.
The correct solution depends on your game’s design.
Handling Narrow Screens
A narrow screen may show less of the level.
This can be a bigger problem for platformers.
Avoid placing critical gameplay information at the extreme edges.
Design important interactions around a safe central area.
Camera and Gameplay Synchronization
Camera movement should not be responsible for gameplay logic.
Keep these systems separate.
For example:
PlayerController
    ↓
CameraController
    ↓
Camera presentation
The player controller determines where the character is.
The camera controller decides how much of that world to show.
This makes the project easier to maintain.
Camera Shake
Camera shake can work in a 2D game, but use it carefully.
A strong rotational shake can destroy the stable 2D presentation.
A better approach may be a small positional offset.
For example:
camera.CFrame = targetCFrame * CFrame.new(
    shakeX,
    shakeY,
    0
)
Keep the effect subtle.
Camera Transitions
Cinematic sequences may temporarily change camera position.
Since the camera is Scriptable, you can transition between predefined CFrames.
The CFrame API supports interpolation, and Roblox’s camera documentation demonstrates tweening Scriptable camera movement.
Camera Focus During Cutscenes
During a cutscene, update both:
- CFrame
- Focus
The camera should continue providing the engine with an appropriate focus point.
Performance
A camera script runs frequently.
Keep the calculations lightweight.
Avoid unnecessary expensive operations every frame.
Cache references where possible.
Do not repeatedly search the entire workspace for the player.
Handling Character Respawn
Players can respawn.
Therefore, do not assume the character exists permanently.
Use CharacterAdded or check for the character before accessing the root part.
A robust camera controller should recover automatically after respawn.
Recommended Production Structure
A larger project could use:
StarterPlayer
└── StarterPlayerScripts
    ├── CameraController
    ├── PlayerController
    └── InputController
The CameraController can contain:
Camera mode
Camera target
Camera bounds
Camera smoothing
Camera zoom
Camera shake
Aspect ratio
Cutscenes
This modular approach is easier to maintain.
Frequently Asked Questions
Can Roblox use a real orthographic projection?
The current standard Camera API does not expose a native orthographic projection mode.
What is the closest approach?
Use a Scriptable camera with fixed orientation, controlled distance, suitable FOV, and constrained movement.
Is a low FOV true orthographic projection?
No.
Why use Scriptable?
It prevents the default camera system from automatically controlling the camera and allows your code to determine its CFrame.
Can I make an exact 2D platformer?
Yes. The gameplay can behave as 2D even though the underlying rendering remains 3D.
Should the character be locked to one axis?
Usually, yes, if the goal is a conventional side-scrolling 2D experience.
Can I make a top-down game?
Yes.
Can I make an isometric game?
Yes.
How do I stop camera movement at the level edges?
Use camera bounds and clamp the target position.
How can I make camera movement smooth?
Use CFrame interpolation or TweenService.
Why does my camera move after I set CFrame?
Check that the CameraType is Scriptable. Otherwise, default camera scripts can continue modifying the camera.
Why should I update Focus?
Focus tells the engine which part of the world should receive priority for certain graphical processing.
How should I support mobile?
Test using Studio’s Device Emulator and design around different aspect ratios.
Conclusion
The most important technical lesson is that Roblox currently does not expose a conventional OrthographicSize-style camera setting through its standard Camera API.
Therefore, building an orthographic-style 2D game requires a custom camera controller.
Use CameraType.Scriptable, control Camera.CFrame, maintain a fixed orientation, manage camera distance, use an appropriate field of view, constrain movement, and establish camera boundaries.
Then build the rest of the game around a consistent gameplay plane.
This approach can support side-scrolling platformers, top-down games, tactical games, puzzle games, arcade experiences, and isometric-style worlds.
The result is not mathematically identical to a native orthographic renderer, but it can provide the stable and controlled visual presentation that many Roblox 2D games need.